Early Trailing Arm Installation and Parts
Parts:
The front mount into the chassis bracket is derived from an aftermarket trailing arm joint made for a Nissan 240/260Z. Currently they are available from http://thezstore.com. Their part number is 23-4190 for the plastic/aluminum cup/boot assembly. The aluminum cup must be drilled out to 1/2" to fit over the ERA stud. The rubber bushing at the front is 23-4321.
A bushed 5/8" male rod end is used at the trailing connection.
Installation:
Thread the trailing arms onto the rod ends (already installed on the lower control arms with jam nuts) so that one or two threads show.
Loosely install two cage mounts onto the front mounting brackets on the chassis. The bevel goes to the front. Install the rear two mounts the same way, but with the beveled corners toward the rear.
Slip a rubber trailing arm bush and washer on each trailing arm stud and loosely install the nut.
Raise the subframe further, guiding the brackets around the mounting tabs on the chassis. Line up the holes with a tapered rod or Phillips screwdriver. Insert 5/16" bolts from the outside into the nuts welded onto the chassis brackets.
Tighten the rod end jam nuts.
Tighten the trailing arm lock-nut so that 1/4" of thread extends past the nut.
Tighten (16 lb-ft) the bolts securing the subframe to the chassis, including the bolts holding the mounts to the Jaguar cage.
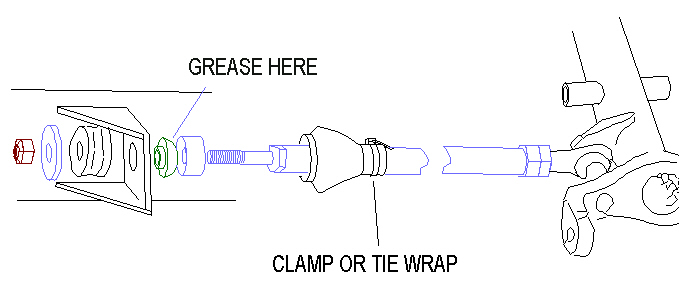
Cover the ball/socket assembly with grease and slide the boot forward to seal the joint. Clamp or tie-wrap the boot to the trailing arm.